You do not need a studio or heavy editing to get sharp, color-true diamond ring photos. This guide shows two fast workflows. First, a smartphone only setup using GemLightbox and GemCam for a clean white background and natural sparkle. Second, a DSLR setup with simple camera settings. You will also learn how to export web-ready files and when to add a light sparkle pass with GemSparkle.
First, let’s learn briefly about the meaning of diamonds.
Why Diamond Photography Matters?
The word “diamond” comes from the Greek adamas meaning “unconquerable,” a nod to its extreme durability. Diamond is the hardest naturally occurring material with a Mohs hardness of 10, so those mirror-like facets resist scratches yet reveal every fingerprint and speck of dust.
As a symbol, diamonds became tied to lasting love in the modern era. The first recorded diamond engagement ring appeared in 1477 for Mary of Burgundy, and the idea exploded in the 20th century with “A Diamond Is Forever.” Power, strength, devotion. All in a single stone.
Why this matters for diamond jewellery photography and every diamond ring photo you take: hardness plus high reflectivity means tiny flaws read loudly. Clean meticulously, use diffused key light with a small hard accent, and aim focus at the nearest table facet. Do this and your diamond ring photo looks crisp, brilliant, and true to color.
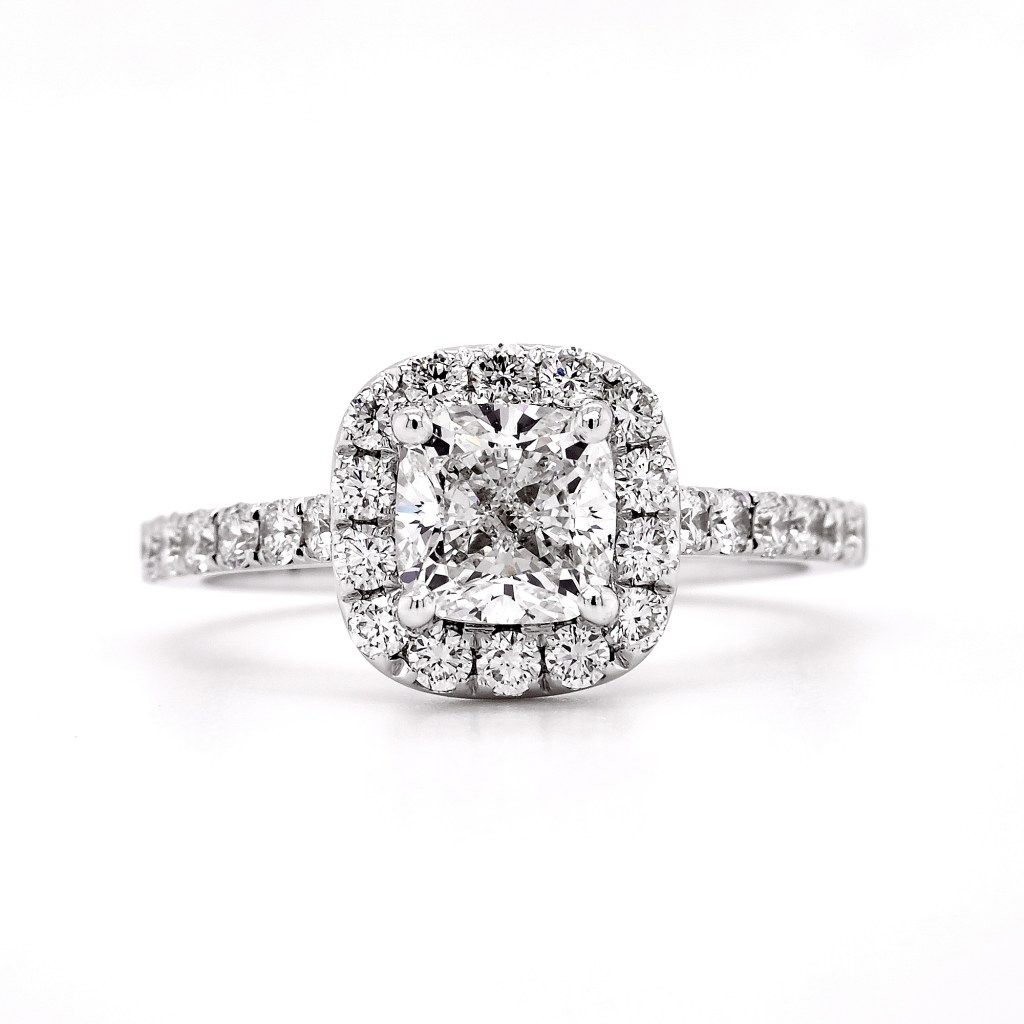
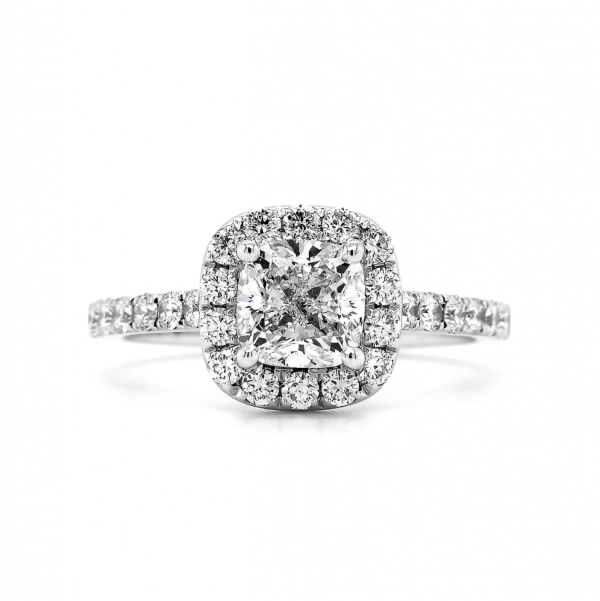
Engagement Ring Photography and It’s Importance!
Engagement rings sell the story before the sale. Clear, color-true images build trust, reduce returns, and help shoppers compare cut, color, and setting at a glance. A strong engagement ring photo turns casual browsing into intent by showing real sparkle, clean prongs, and true metal tone. In short, great visuals are your most persuasive copy.
Here is the simple how
- Start with soft, even light to flatter metal, then introduce a small hard accent to ignite fire.
- Clean the ring meticulously, set it on a neutral background, stabilize your phone or camera, and focus on the facet closest to the lens so the diamond reads razor sharp.
- Keep a comfortable working distance and frame with a little headroom.
- Tools like GemLightbox and GemCam make this repeatable, giving you a diamond ring photo that pops without heavy editing.
If you are tackling diamond jewellery photography at scale, a controlled lightbox workflow keeps every image consistent while still capturing that moment-of-sparkle buyers expect.
For a fast, repeatable approach, use soft, even light with a small hard accent to spark fire, set a neutral background for a pure white background jewelry look, stabilize the camera, and focus on the facet closest to the lens. These simple iPhone ring photo tips work when you photograph diamond ring with phone at home or in store, and they scale with a lightbox.
Lightbox jewelry photography with GemLightbox and GemCam gives consistent results, while GemSparkle adds controlled scintillation for video. If you prefer a camera, start with conservative DSLR settings for jewelry like ISO 100 to 200 and f/11 to f/16. Whether you shoot on location or how to photograph diamond ring at home is the goal, the formula is the same: clean, light, stabilize, focus, then capture a crisp macro ring shot that lets the diamond speak.
How to Photograph a Diamond Ring?
For this session, we will be using a 60mm macro lens, a Fujifilm X-T2 camera, and the GemLightbox.
Equipment used:

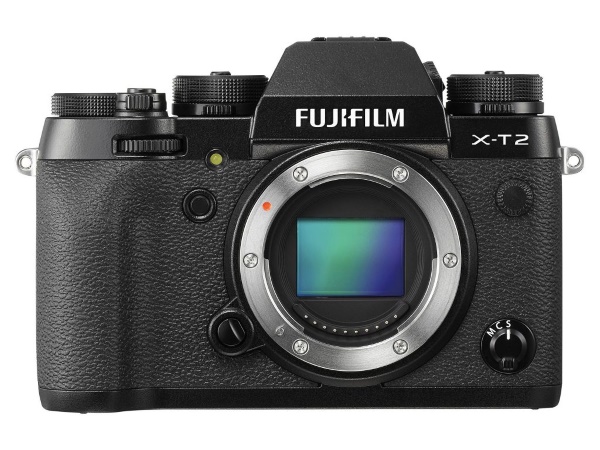
We designed the GemLightbox for simplicity, so the photography process is almost foolproof — no grand setup or advanced skills are required.
Step 1. Place the diamond ring inside the GemLightbox.
Attach your DSLR camera to the tripod and place the diamond ring inside the GemLightbox. We placed the GemLightbox 25cm away from the camera lens.
Step 2. Adjust your DSLR settings.
After placing the diamond ring, adjust your DSLR settings to get the quality you desire. We set the aperture to 11, a slower shutter speed, and set the exposure level to 1.
Step 3. Click to capture.
Once you’re happy with the settings, tap on your camera screen to focus and click to capture. See below.
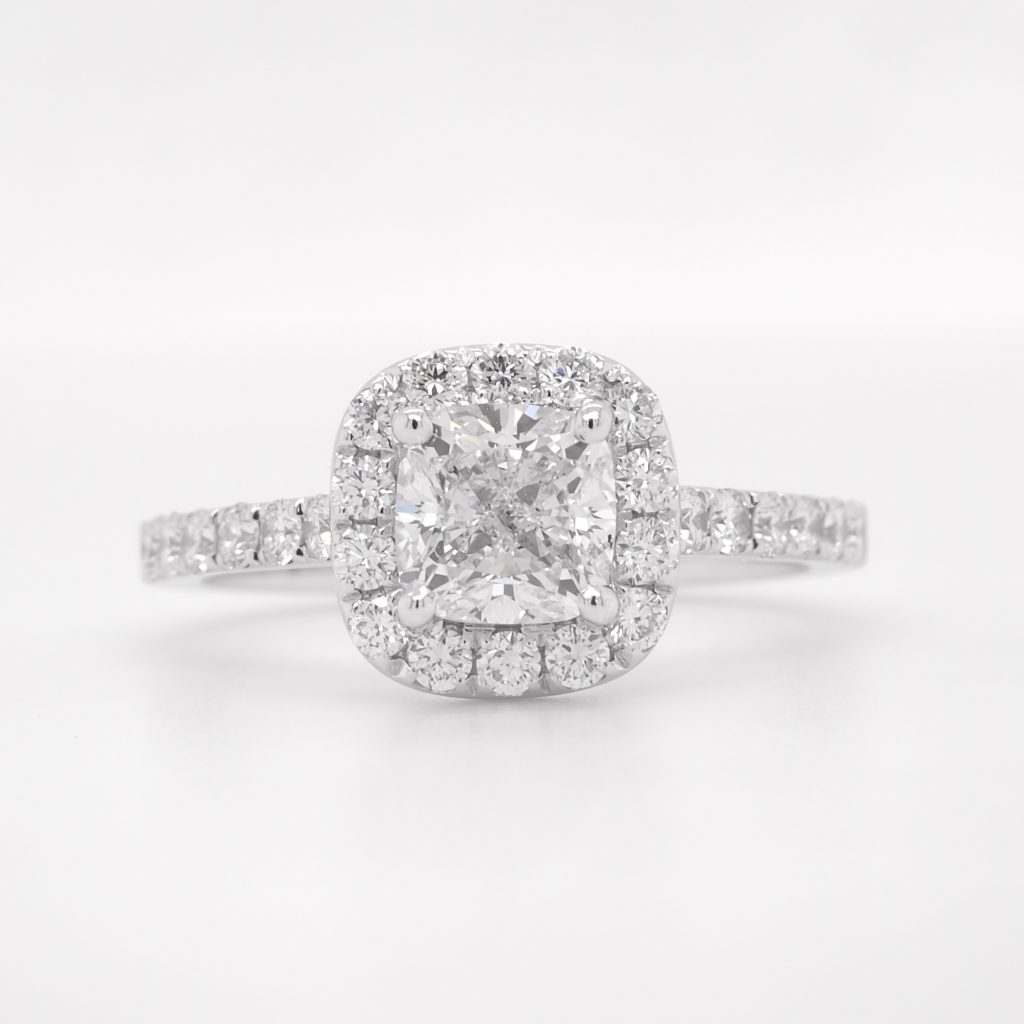
Although the photo was sharp and somewhat acceptable, Photoshop can still improve its overall quality, including its grayish background.
You can also watch the complete photography tutorial below.
How to Photoshop a Jewelry Photo?
In this section, we will show you how to polish a jewelry photo to perfection using Photoshop. We will be using the same photo we shot above.
Here’s our starting image.

1. Crop and resize the image.
We used the “Square” setting on the Fujifilm XT2 camera. The raw image came as 4000px x 4000px.
Currently, the image is at 45.8MB, which is far too large for any website. Since we will be using this image for web purposes only; it doesn’t have to be that large. Hence, using Canvas, we will resize it to 1500px x 1500px. This is the image size most compatible with most websites or online platforms.
To access canvas size, go to ‘Image’ > ‘canvas size.’


You will notice from above that there is very little white space in the image. We will need to add some padding by resizing the image.
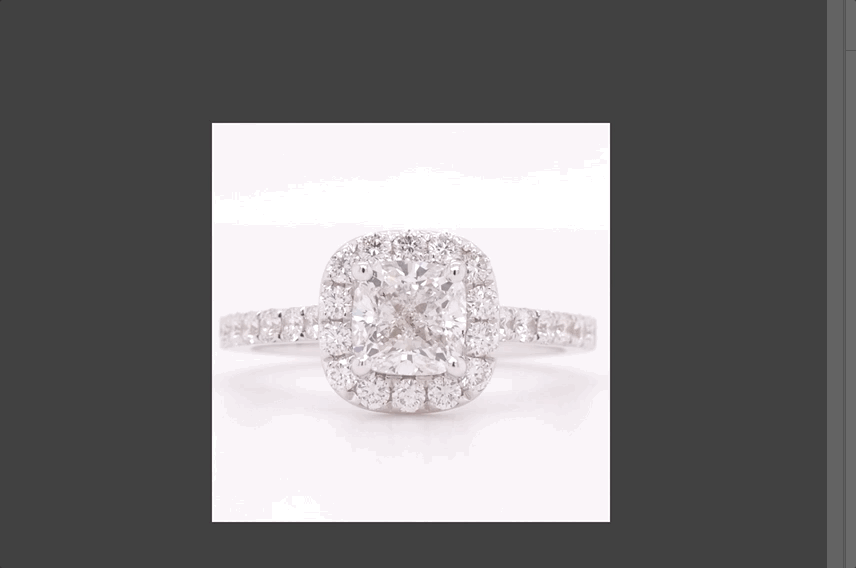
Now, here’s what the image looks like after resizing.
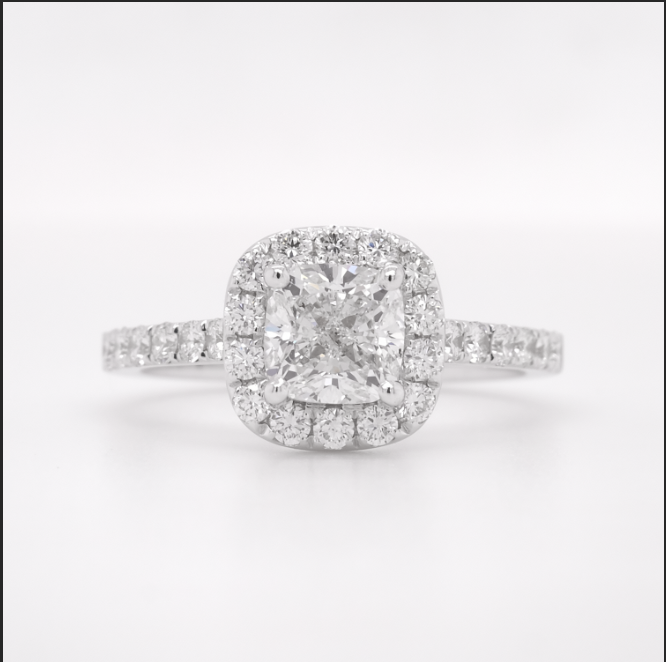
2. Adjust ‘Levels’ to achieve a completely white background.

Levels in Photoshop help you correct the tonal balance and tonal range of the photo by adjusting the intensity level of shadows, mid-tones, and highlights of your image.
You can do the following:
- Darken shadows.
- Play with mid-tones to get diamonds the correct contrast.
- Push highlights higher until you get a white background.
Always refer to the histogram to achieve the proper color balance and tonal range.

3. Sharpen the image.

Sharpen the image with sharpening filters. We used Smart Sharpen in this image. Smart Sharpen is Photoshop’s most advanced tool for sharpening. It’s also easy to use.
4. Save the image and voila!
Here’s a side-by-side comparison.


Pros and Cons of Using a DSLR
Overall, we spent 10 minutes in photography and Photoshop.
Photography: 5 minutes
Photoshop: 5 minutes
Pros:
- More detailed zoom capability.
- There’s a macro view of the diamond.
- You have flexible controls.
- You have full control over the depth of field.
Cons:
- Expensive.
- Maintenance cost. The camera lens should be kept clean all the time.
- Bulky.
- Transferring files from memory sticks to the computer could be laborious.
- Detailed photography means you will also capture dust and other blemishes; hence, requiring post-processing all the time.
- Photoshop skills and knowledge are a must to get the results you want.
Jewelry photography doesn’t have to be complex all the time, especially if you are just photographing images for web purposes where a smartphone camera is capable of producing decent quality.
When photographing jewelry, consider not just the cost but also the time and effort involved as time wasted, when there’s a more efficient process, could have been time used productively to improve other aspects of your operation.
What’s your jewelry photography process? Do you use a smartphone or a DSLR? Let us know in the comment section below!
Questions About Diamond ring Photography
Is window light better than LEDs?
Both work. Window light is free and flattering when diffused. A lightbox like GemLightbox gives repeatable, neutral lighting and faster results for catalogs and marketplaces.
Why avoid built-in flash?
On-camera flash is small and frontal, which creates harsh reflections on metal and a flat-looking stone. Use diffused light and a separate small accent for sparkle instead.
Do I need a macro lens?
It helps. A phone macro attachment or GemCam will capture facet detail without shadowing the ring.
How far should the camera be?
About 12 inches from the ring in window light. In GemLightbox, start at 8–12 inches and adjust framing with zoom rather than moving too close.
How do I make the diamond “sparkle”?
Add a small hard light at a low angle and move it until you see crisp point highlights. Keep it subtle so you do not clip the stone.


Leave a Reply