
Table of Contents
- Affordable Cameras – Using A Smartphone for Jewelry Photography ($0)
- Affordable Tools – GemSparkleTo Bring Out A Gem’s True Sparkle (US$449)
- Affordable Props and Backgrounds ($0)
- Conclusion
If you’re starting a jewelry business, high-quality product photos are essential; but you don’t need to invest in an expensive studio. With the right tools and a few smart techniques, you can build a budget-friendly jewelry photography setup that produces clean, professional, and consistent results.
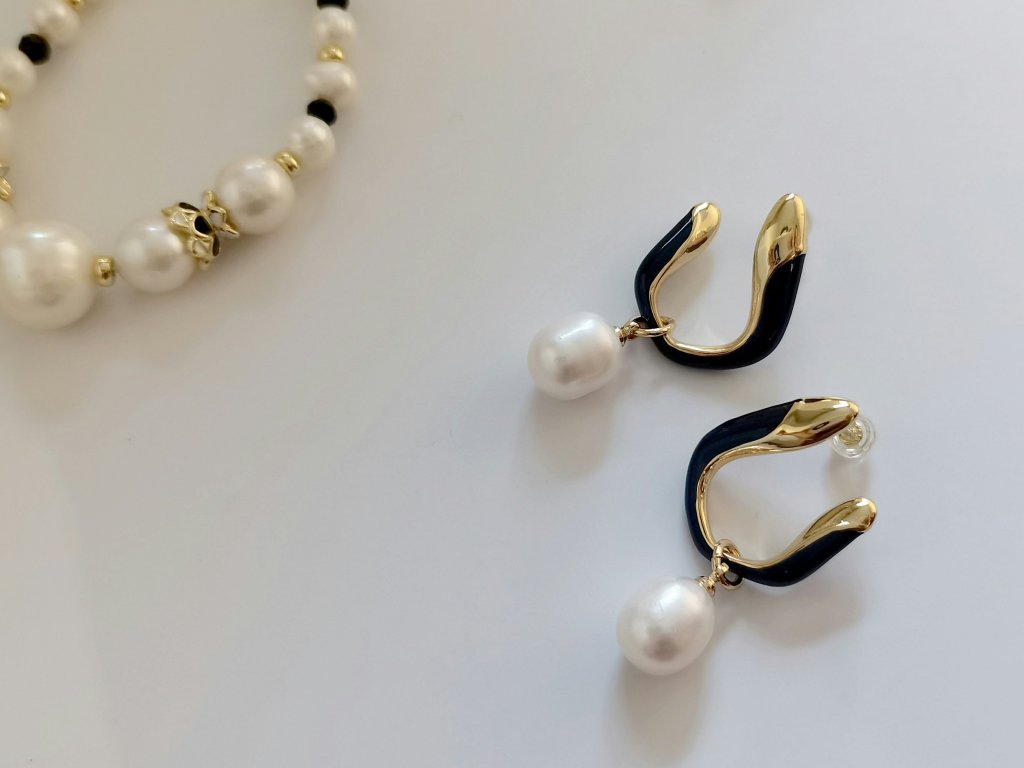
Whether you’re photographing gold, diamonds, fine jewelry, or handmade pieces, better visuals will instantly elevate your online store and help your social media stand out.
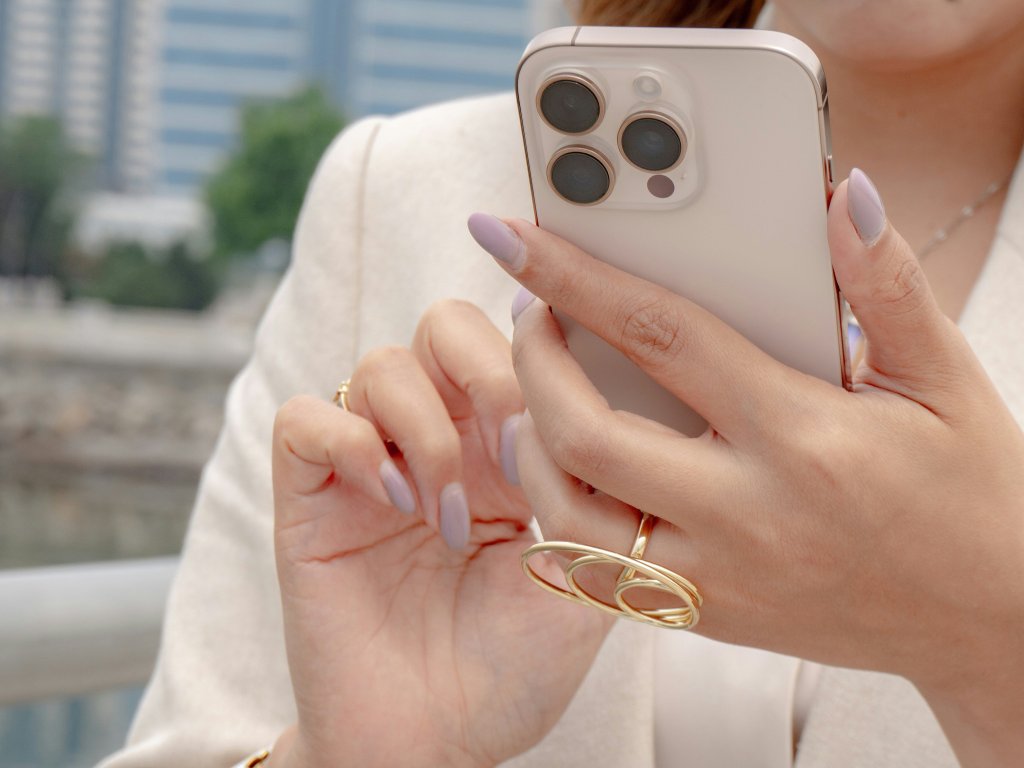
1. Affordable Cameras – Using A Smartphone for Jewelry Photography ($0)
You don’t need a fancy DSLR, just by using the smartphone you use daily, you can be able to produce high quality jewelry shots. Modern smartphones are powerful enough when paired with good lighting. There are a few key tips for setting up your smartphone such that it is optimal for capturing the true colour and shine to your jewelry pieces.
Smartphone Presets for Jewelry Photography
Here’s how to set up your smartphone presets so it captures the true color, clarity, and brilliance of your jewelry:
- Built-in Filters: Apply your preferred filter directly in the Photos app. To save it as your default style, go to:
- Settings → Camera → Preserve Settings → Creative Controls.
- Settings → Camera → Formats → Enable ProRAW
Affordable Camera Alternatives to Explore for Jewelry Photography (Optional Upgrade)
Traditional DSLRs can cost thousands, and you’ll still need to adjust settings manually to manage color, shine, and reflections.
If you want an upgrade beyond your phone but without the complexity of a DSLR, the GemCam Pro is a strong option. As the world’s first jewelry, diamond, and gemstone camera, it’s designed to capture flawless 360° product photos and videos that are perfect for online stores, marketplaces, and social ads.
2. Affordable Tools – GemSparkle To Bring Out A Gem’s True Sparkle (US$449)
A sharp photo is great, but brilliance is what truly sells jewelry. That’s where GemSparkle comes in.
With adjustable color temperatures from 3000K to 6500K, GemSparkle adapts beautifully to diamonds, gemstones, gold, and silver. It enhances natural fire and sparkle, helping even smartphone photos look more refined and high-end.
For a limited time from now until 31 December, the GemSparkle is available for US$299 for you to be able to capture your jewelry’s true sparkle for an even more affordable price.

The GemSparkle has the following functions in order to give your jewelry back its fine:
- Compact and portable — take studio-quality lighting anywhere.
- 5x magnification — highlights fine details and gemstone cuts.
- Sparkle-enhancing lens — designed to maximize brilliance.
- High CRI lighting — ensures accurate, true-to-life colors.
If you’re photographing fine jewelry or gemstones, GemSparkle is one of the easiest ways to elevate your product shots instantly.
3. Affordable Props and Backgrounds ($0)
GemSparkle and GemCam Pro both come with two complimentary backgrounds (white and eclipse) so you can start photographing immediately without buying extra backdrops.
You can also achieve great lighting using inexpensive DIY solutions, with soft, faint shadows that are not too harsh, not too flat.
How to Setup a Budget Working Lighting System Indoors
- Keep both lights at the same height and spaced about 45° apart. Mark positions with tape for consistency.
- Lock your exposure before shooting as smartphones tend to readjust mid-shot.
- Add a white card opposite your main light to soften shadows.
- Diffuse harsh reflections
- Budget Protip: wrapping the light with plain tissue paper.
- Ensure ample distance between your pieces and the lights, for a reference:
- Rings → ~20–25 cm
- Pendants → ~30 cm
How to Shoot with Consistent Lighting Outdoors
When shooting outdoors, overhead booth LEDs can cause flicker. GemSparkle’s diffuser helps minimize this.
More low-cost tricks using simple materials thoughtfully can achieve results close to a professional studio:

- Short pans create fewer exposure shifts than long ones.
- Stick to 3 hero angles: front, top-tilt, side-tilt.
- A small foam board adds lift to shadows without creating hotspots.
By using homemade materials well, not only will you achieve the same lighting that is used in professional studios, but you will also gain similar effects.
Creating Social Media Ready Lifestyle and Model Images
Clean product shots are essential, but lifestyle images and model photos are what stop scrolling on social platforms. However, Professional lifestyle or model photography can cost anywhere from $500 to $5,000 per session, depending on the production scope.
A wallet-friendly and foolproof solution is the new GemStudio feature; using next-generation AI, it transforms your product photos into on-brand lifestyle scenes and model shots in just one click; perfect for Instagram, ads, and store banners.
Why use GemStudio?
- Lifestyle and model shots have been shown to increase ecommerce conversion rates.
- 22% fewer product returns occur when customers can visualize real-life usage through model and lifestyle visuals.
- Businesses using GemStudio can have a 40–60% reduction in content production time, allowing them to launch collections, promotions, or seasonal campaigns significantly faster.
Conclusion
You don’t need an expensive studio to create professional, scroll-stopping jewelry photos. With a few smart choices and budget-friendly tools, you can build a setup that delivers consistent, high-quality results.
For beginners on a budget, remember:
- Use your smartphone or a basic camera
- Add soft, consistent lighting or a lightbox
- Keep props simple and backgrounds clean
- Consider upgrades like GemSparkle or GemCam Pro for better brilliance and detail
A thoughtful budget setup helps your products shine online, builds customer trust, and makes your jewelry store look polished and professional—without breaking the bank.


Leave a Reply